



Contents
- What you need
- Step 1: connect the store
- Step 2: tell the app what statuses and payments mean
- Step 3: connect the courier and the sender address
- Step 4: the parcel weight
- Step 5: pick the service with delivery rules
- Step 6: start the automation
- What "ready to process" means
- Check that it works
- If notifications stop
A WooCommerce store usually has separate plugins for the courier and for invoices, and after every order someone still checks the address, picks the service and requests the label by hand. When plugins clash or an order has a wrong phone number, the parcel leaves late.
This guide shows how to connect WooCommerce and get a label requested from the courier automatically for every order that has no problems. You connect once, with no API key copied by hand.
What you need
- A WooCommerce store where you are an administrator.
- An account with at least one courier from the integrations list (Sameday, FAN Courier, Cargus, DPD, GLS and others) and its credentials.
Step 1: connect the store
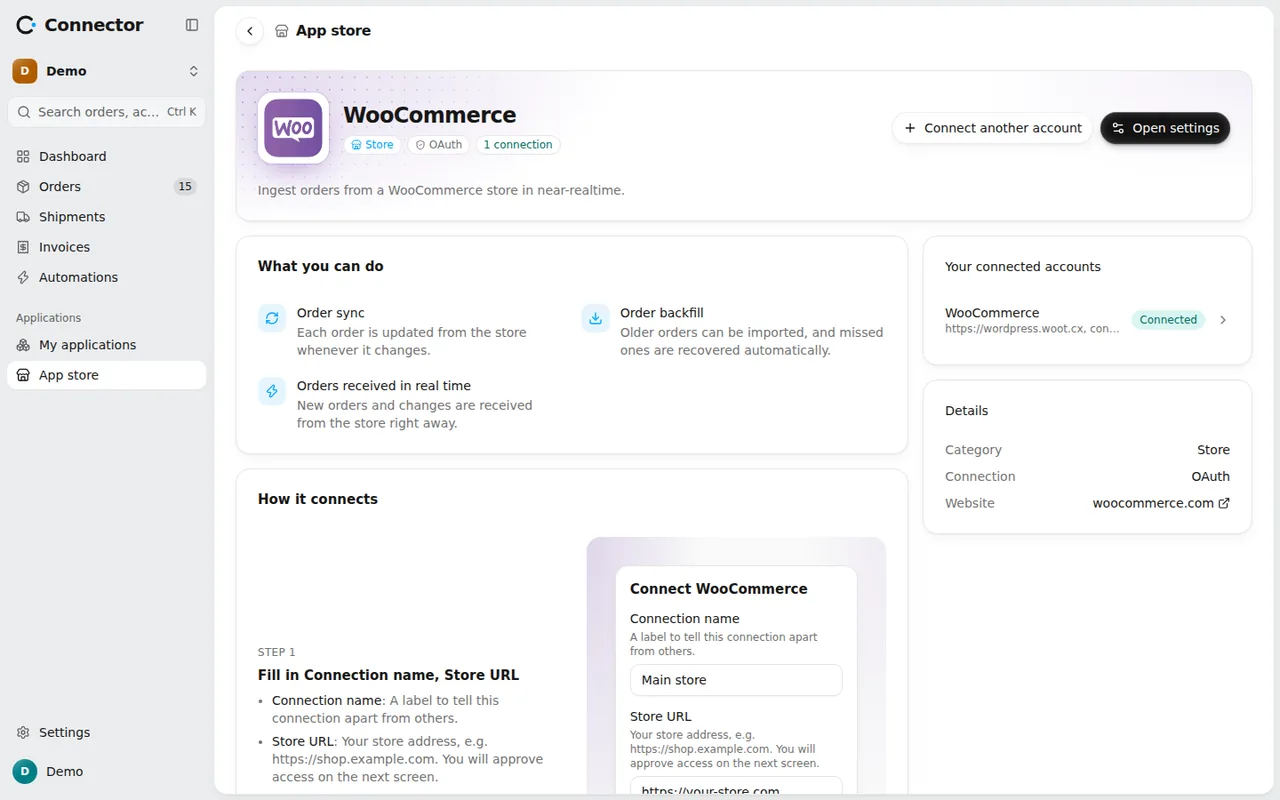
In the app, open Applications → App store, pick WooCommerce and press Connect. Fill in Store URL (for example https://shop.example.com) and, if you like, a Connection name to tell it apart from other stores. Press Continue.
You are sent to WordPress, where WooCommerce shows the permissions we ask for. You approve them, and the access keys are created and reach us on their own. You install no plugin on your site, and the order notifications (webhooks) are set up automatically.
At the end the app asks which orders to bring in: only new ones, or the ones already placed too. Automations start only for new orders, so older imported orders do not get labels on their own.
Step 2: tell the app what statuses and payments mean
From My applications, open Settings on the WooCommerce card. Three sections matter.
- Statuses: for each store status, custom ones included, you choose whether the order is active, cancelled or closed.
- Payments: for each payment method you choose the type, card or cash on delivery. A method left without a type is not recognized as cash on delivery, and a problem shows on the order. The cash on delivery amount reaches the label only when the type is set right.
- Import: the statuses a new order must have to come into the app.
Changes apply to new orders and to those not processed yet.
Step 3: connect the courier and the sender address
From the same App store, pick the courier and fill in the account details. They are checked on the spot, and the account's services become available.
Then, in Settings → Shipping → Sender addresses, add the address your parcels leave from. Without it, a label cannot be requested.
Step 4: the parcel weight
The store does not send product weights, so the app uses the default packaging from Settings → Shipping → Packaging and warns you. With no default packaging, the order gets the problem "The parcel weight is not specified and there is no default packaging." and the label is not requested. Set a default packaging with the weight of your usual parcel; for a heavier order, change the weight on the order before the label.
Step 5: pick the service with delivery rules
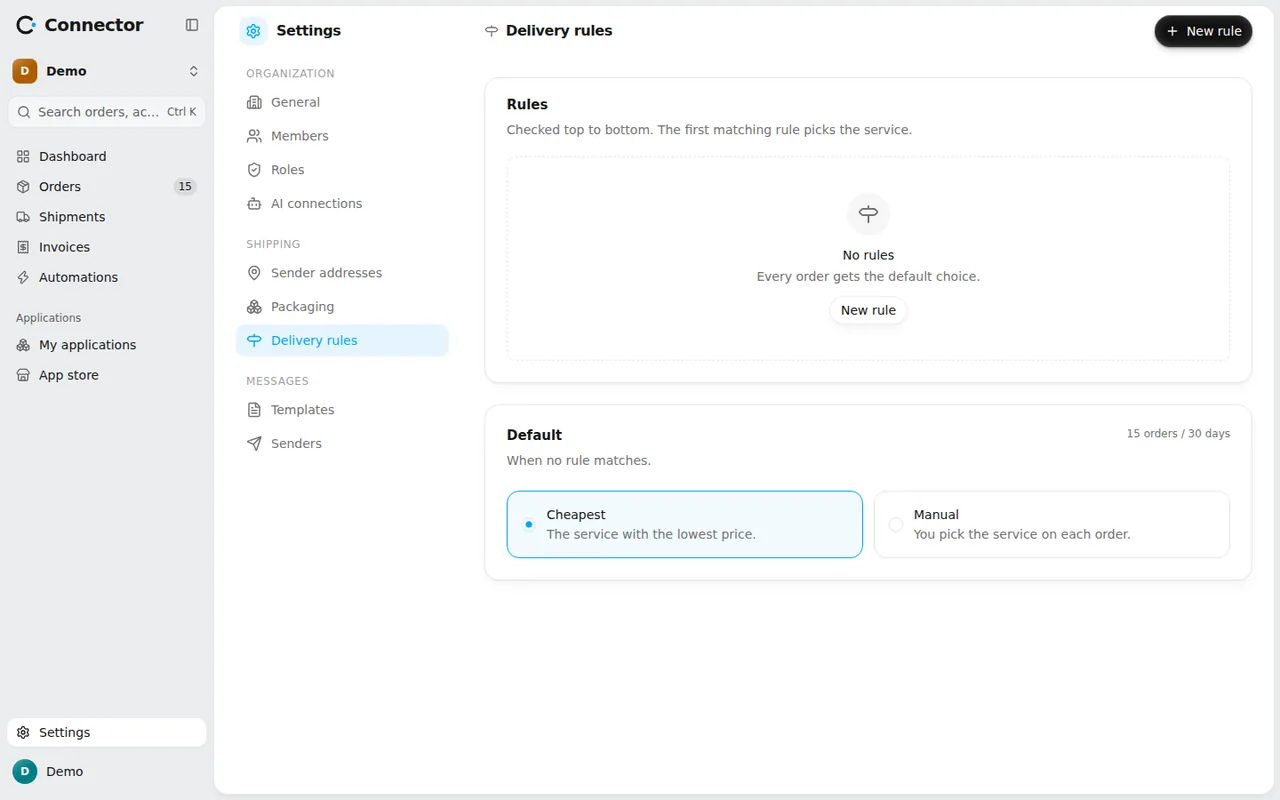
In Settings → Shipping → Delivery rules you decide which service each order gets. With no rules at all, orders get the Default, Cheapest. For fully automatic labels do not leave it on Manual: an order with no service chosen cannot get a label on its own. The details are in the guide on delivery rules.
Step 6: start the automation
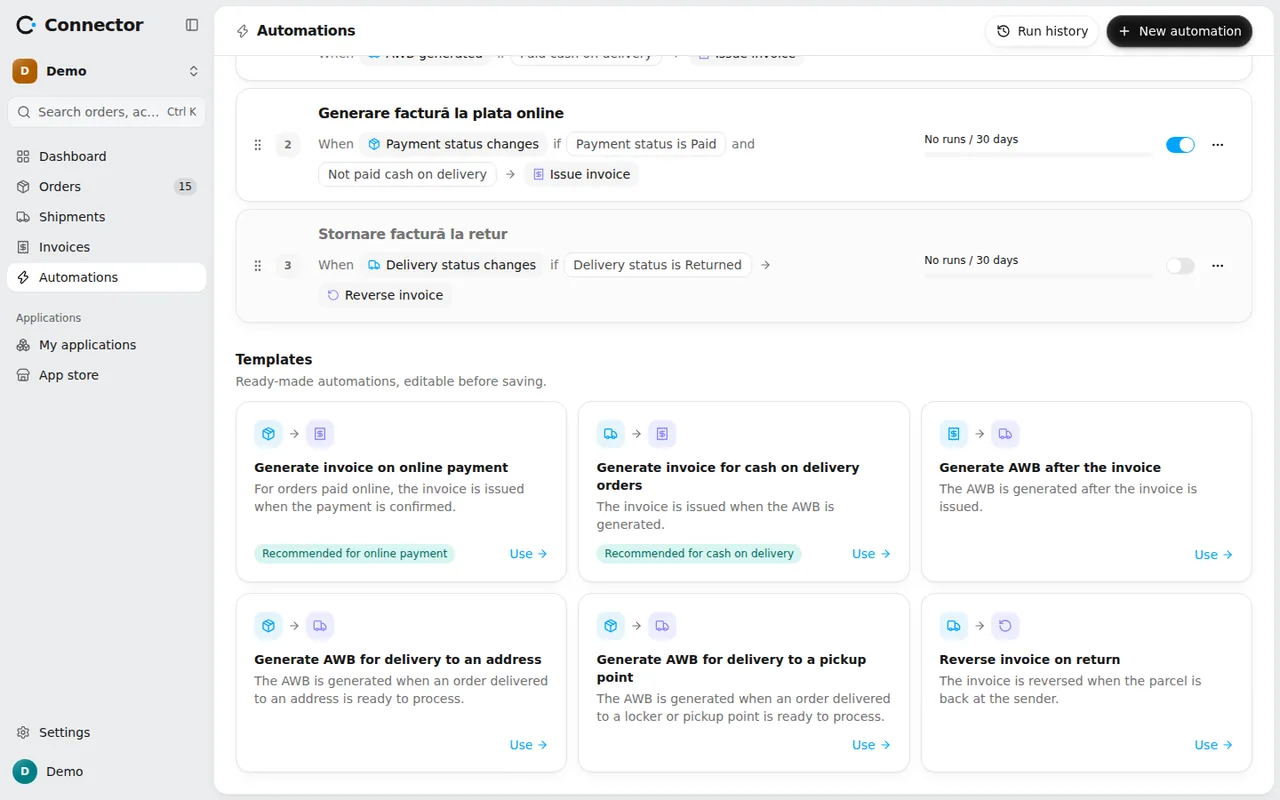
In Automations, in the Templates section, press Use on:
- Generate AWB for delivery to an address, for orders delivered to the customer's door;
- Generate AWB for delivery to a pickup point, for lockers and pickup points.
Both start on the Order ready to process event and run the Generate AWB action, with the service chosen on the order. You can change the conditions before saving.
What "ready to process" means
An order is ready to process when it has no problem that blocks shipping: the address, the city, the phone, the weight, the sender address and, where it applies, the pickup point. If something is missing, the order shows the problem and no label is requested. You fix the data on the order's page, the problem closes by itself and the automation starts then.
An order cancelled in the store, or one that already has a label, never gets one automatically.
Check that it works
Place a test order in the store. It shows up in the order list within seconds. In Automations → Run history you see which order started the run, which steps ran and, if something failed, why.
If notifications stop
WooCommerce turns a webhook off after several errors in a row. When you reconnect the store, the app turns them back on and sets them up again. The access key stays in WooCommerce and, if you disconnect the store, you revoke it under WooCommerce > Settings > Advanced > REST API keys.