



Contents
A Shopify store usually follows the same routine after every order: open the courier's app, copy the customer's name, phone and address, pick the service, create the label and print it. At ten orders a day that is an hour. At a hundred, it is somebody's whole job.
This guide shows how to switch to labels created automatically: the order comes in from Shopify, checks itself, gets the right delivery service, and the label is requested from the courier without you opening anything. You set it up once.
What you need
- A Shopify store you administer.
- An account with at least one courier: Sameday, FAN Courier, Cargus, DPD, GLS or any other in the integrations list. You can connect several.
- The courier account's credentials. Each courier asks for something different (user and password, an API key or the pickup point ID); each integration's page says exactly what.
Step 1: connect your Shopify store
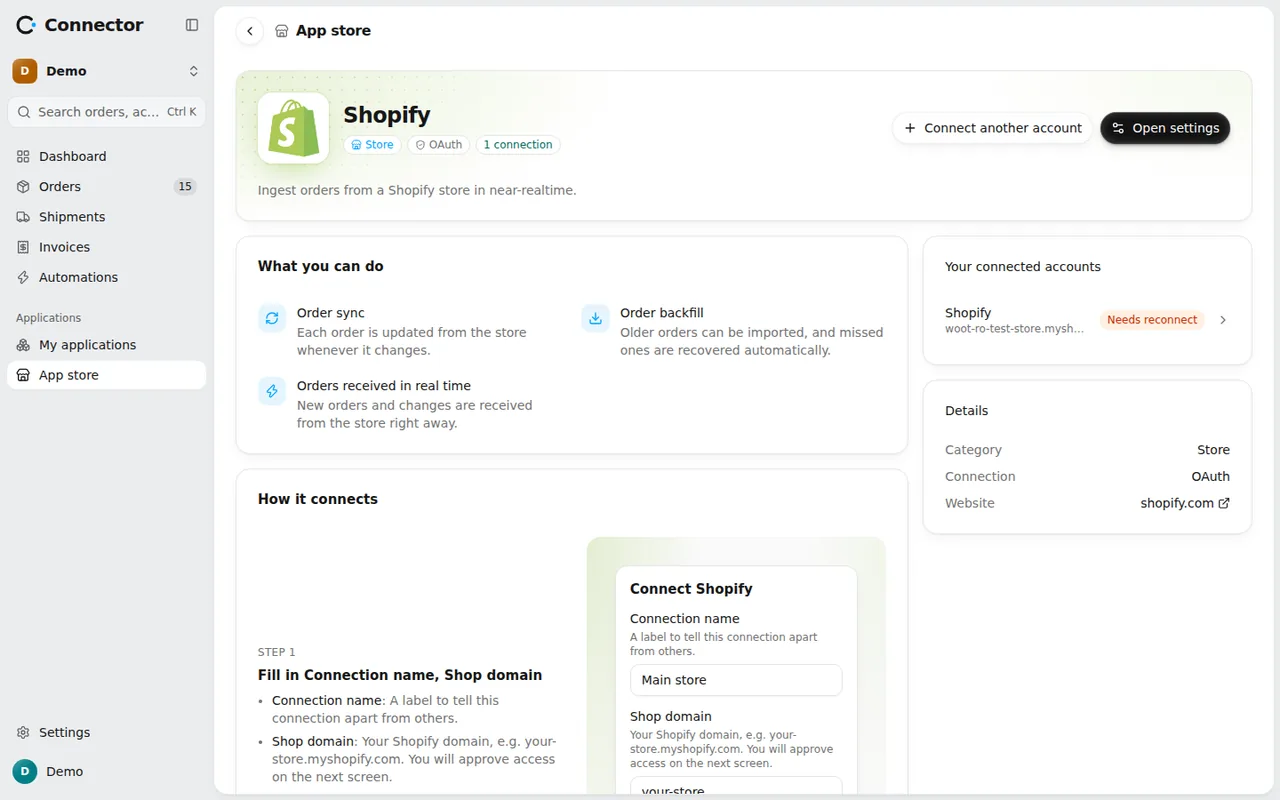
In the app, open Applications → App store and pick Shopify. Type your store's address (the one ending in .myshopify.com), then Shopify asks you to approve access. You never copy an API key.
From then on, every new or changed order shows up in the order list within seconds, cancellations and refunds included.
Step 2: connect your courier account
From the same App store, pick the courier and fill in the account details. They are checked on the spot, and your account's services (home delivery, lockers, pickup points) become available.
If you work with several couriers, connect them all: in step 4 the app can choose between them.
Step 3: add the sender address
In Settings → Shipping → Sender addresses, add the address your parcels leave from. The courier prints it on the label as the sender and picks the parcel up there. With several warehouses, add one address for each and mark the main one.
Step 4: pick the service with delivery rules
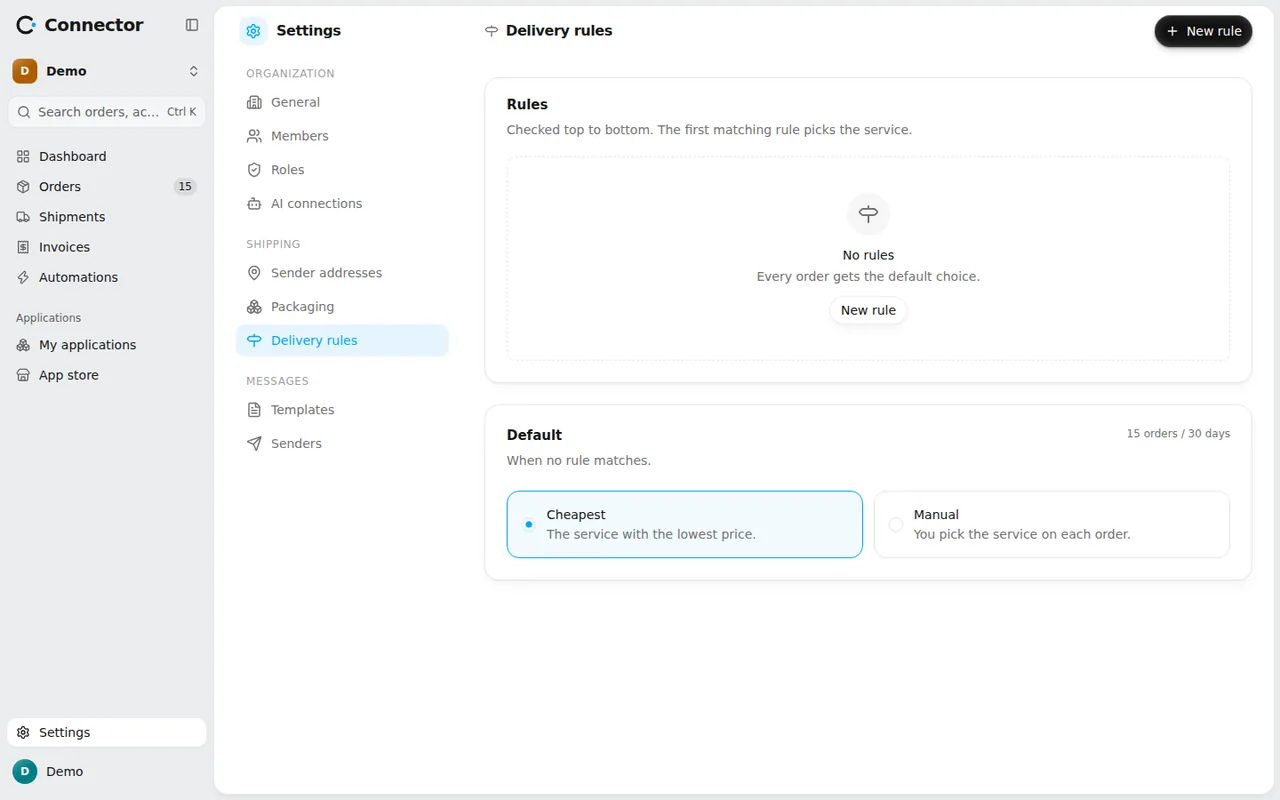
In Settings → Shipping → Delivery rules you decide which service each order gets. There are two levels:
- Default: what happens when no rule matches. Choose Cheapest (the lowest price across your accounts) or Manual (you pick the service on each order).
- Rules: the exceptions. A rule has conditions (weight, region or payment method, for example) and a service: the cheapest, a priority list or one fixed service.
Rules are checked top to bottom, and the first one that matches picks the service. As you write the conditions, you see how many recent orders would match.
For fully automatic labels, do not leave the default on Manual: an order without a service cannot get a label on its own.
Step 5: turn on the automation
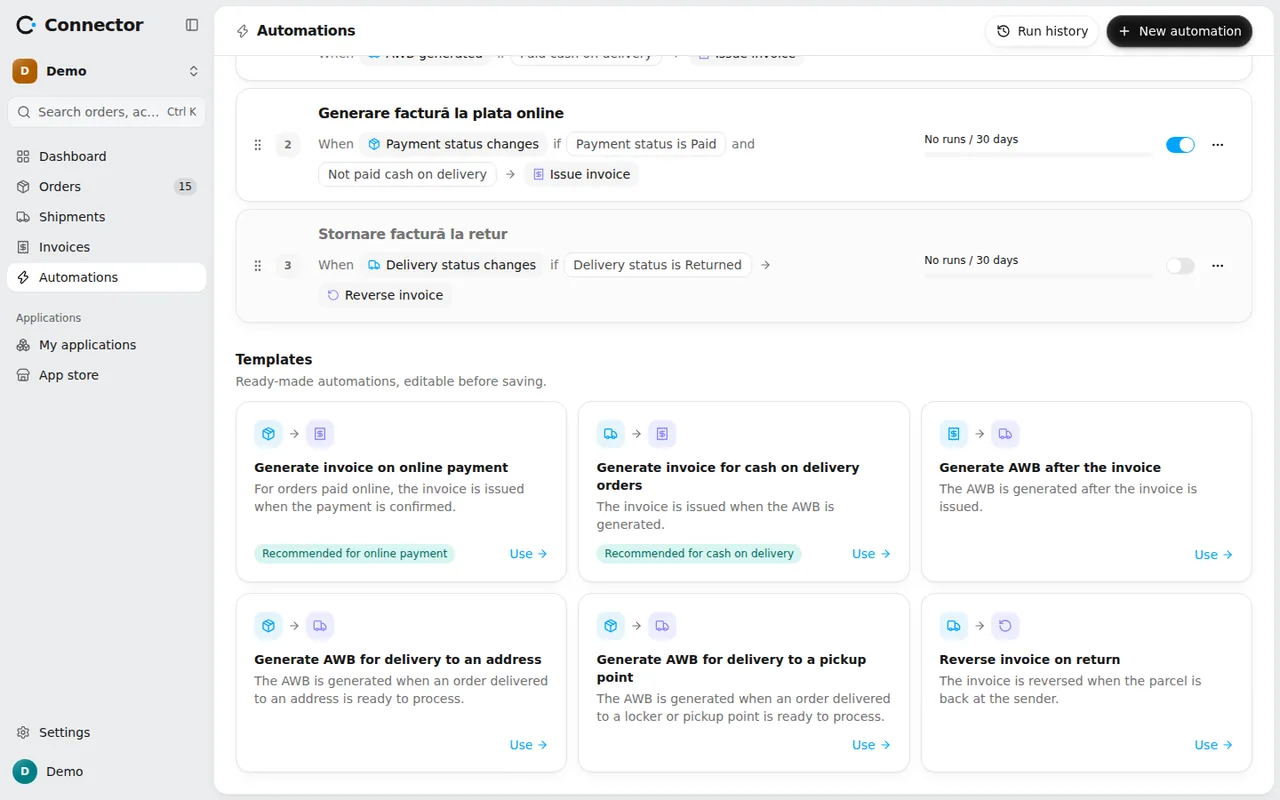
In Automations, below your active automations, there is a Templates section. Click Use on:
- Generate AWB for delivery to an address, for orders delivered to the customer's door;
- Generate AWB for delivery to a pickup point, for orders delivered to a locker or pickup point.
Both start on the Order ready to process event and run the Generate AWB action, with the service chosen on the order in step 4. You can change the conditions before saving, for example to run only for one store.
What "ready to process" means
An order is ready to process when nothing blocks its shipping. The app checks every order as it comes in from Shopify: the delivery address, the town, the phone and the other details the courier needs.
If something is missing or wrong, the order shows the issue and no label is requested. You fix the details on the order's page, the issue goes away by itself, and the automation starts then.
Some orders never get a label automatically: an order cancelled in the store, and an order that already has a label. So you never pay twice for the same parcel.
Check that it works
Place a test order in Shopify. Within seconds it shows up in the order list, and once it passes the checks it gets its label. In Automations → Run history you see every run: which order started it, which steps ran and, if something failed, why.
From there the label is tracked by itself: the delivery status updates on the order until delivery or return.
What to automate next
- The invoice: the Generate invoice for cash on delivery orders template issues the invoice when the label is created, and Generate invoice on online payment issues it when the payment is confirmed.
- The message to the customer: on the AWB generated event you can send an email or a text with the tracking number.
- Returns: Reverse invoice on return cancels the invoice when the parcel comes back to you.